|
This is a short
illustrated tutorial on how to make a menu using Xara Menu Maker
1.1. Much of what I learned comes from Cricket of
www.gnc-web-creations.com She has a great site with
so much information. If you can take her online course on
Website search engine optimization I highly recommend it. Her
e-book has been invaluable to me. |
| Xara Menu Maker 1.1
and Frontpage 2003 (Assuming you have downloaded the file, and downloaded the Frontpage extension file that integrates Xara with your Frontpage program...this covers you from that point |
 |
|
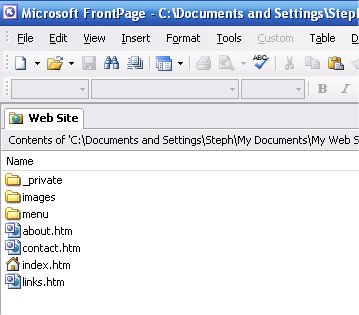
Before you make your
Menu, make a new folder in your website and name it menu. This is
where you will eventually "Save Graphics" to when you are done
making your new Xara menu. This will keep your Frontpage
directory neat and organized as opposed to small graphic files all
over the place. |
 |
|
1. Make a blank page in your website and
name it menu.htm |
|
HINT: I find it much easier to make the menu if I write down in a row, alphabetically (or the order you want the buttons to appear) what buttons you want, and next to the label (name of button) write down the .htm page as it is named in the site. For example about.htm Might be labeled About Us or ABOUT US or About Our Company but the page name is about.htm If you write
them down and have them next to you, making your menu will be much
easier |
 |
|
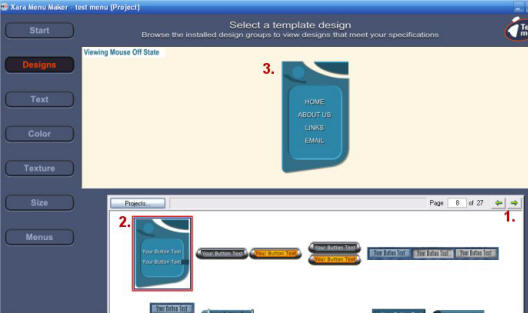
1. Use the green arrows to scroll through the
many designs available to you. |
|
HINT: I
have passed up many designs sure they would not look good only to
find later that with a bit of tweaking, new color and just simply
trying them to see what they look like, I actually have made some
incredible menus. |
|
|
|
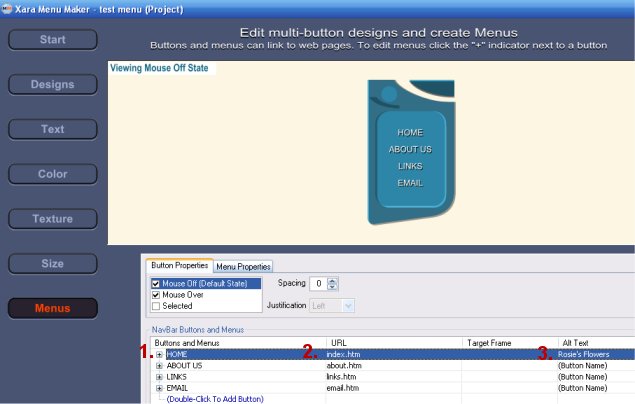
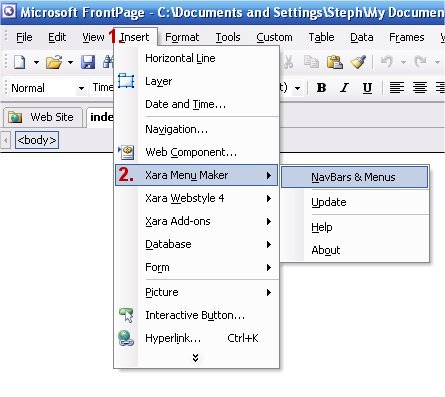
1. On the left side you will see the button
called Menus, click that and you can now add your menu buttons.
Home is usually first. 2. The home button in this site is really the index.htm page as you can see 3. Alt Text is for another name you would like to appear if a mouse goes over that button, such as Rosie's Flowers or whatever you choose. If you have a Button called Contact and the link is contact.htm you may want the Alt Text to read Contact us by email, phone or fax (you can say anything you like) |
|
|
|
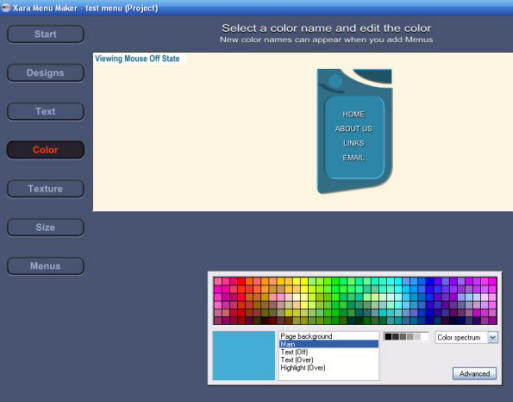
1. Click the
color tab on the left to change the color of your menu to match your
website. In this example, the menu is a few shades of
blue's... |
|
|
|
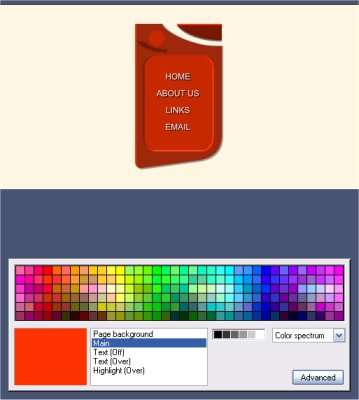
1. Select Main, then
using the color picker, touch the color you want, for example, red!
Watch how it changes your menu above! |
|
|
|
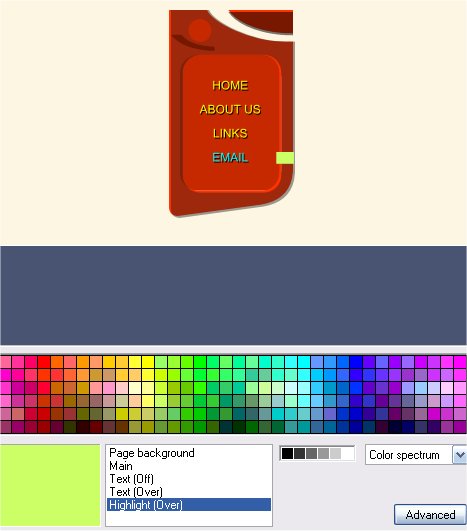
1. Going down the
list of options, change the colors to find just the right
combination that is easy for visitors to see and enhances your
website. As you go through colors, check the example above and
see how they look. |
|
|
|
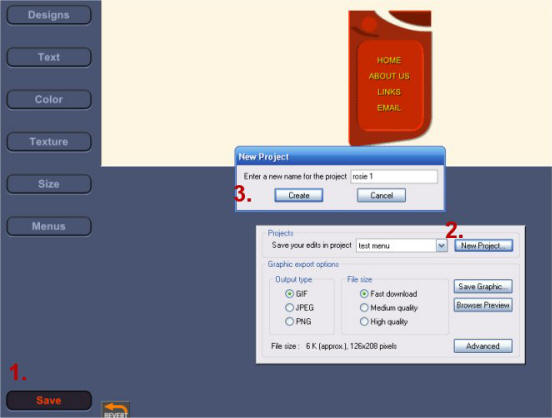
1. When you are
happy with your menu, click Save at the bottom left part of the
screen. 2. Now Click New Project 3. Enter a name like rosie 1 or Family 1 I number them as I often change them and need to find the last one I did, so be sure to put 1,2,3 after it, that will make it easy to find the most recent copy of the menu for editing later on. (I think there is an edit feature, to bring up your menu, but it doesn't always work in mine, I save a new copy each time) The NEXT step is CRITICAL, So Pay close Attention! |
|
|
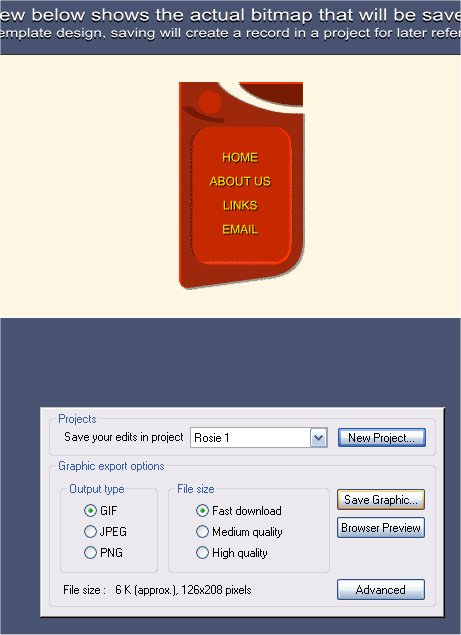
| 1. You have now named your project and it will appear in your Projects Window. Next, Click Save Graphic |
|
|
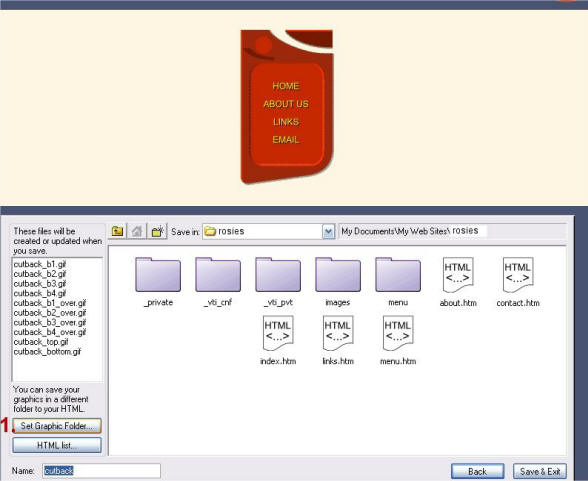
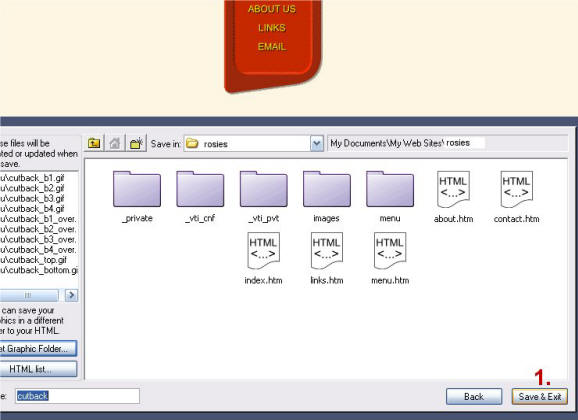
| 1. Your site will pop up (because you were working on it when you made the menu) Click Set Graphic Folder. |
|
|
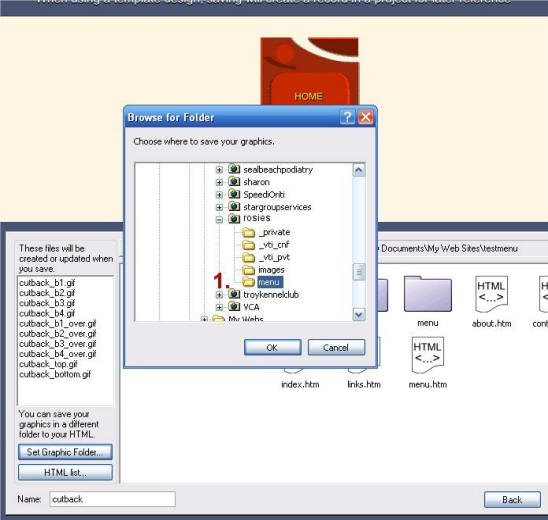
| 1. You want to click on the folder called menu that you made in your website. This is where Xara will save all the many files and graphics it needs to run your menu. |
|
|
| 1. Now click Save & Exit (your site will pop up) |
|
|
|
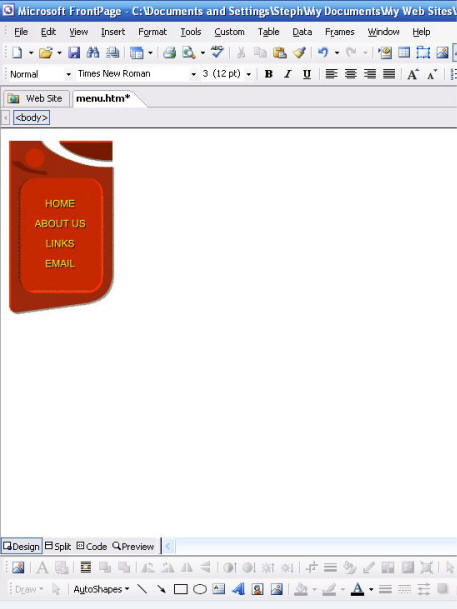
Your site should pop up
with your new menu! |
|
|
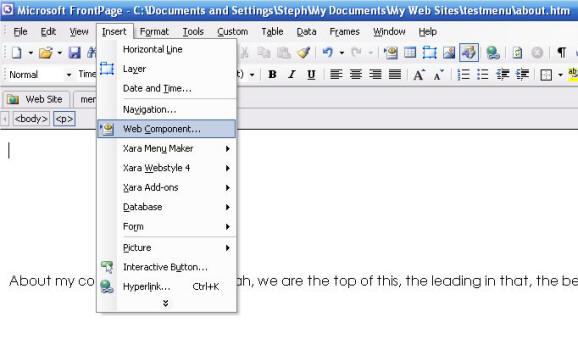
| This is how I get my menu on many pages of the website. The menu you made is on a page called menu.htm that is the page you will always go to if you need to EDIT this menu. So go to a page such as about.htm or contact.htm and then select Insert (from the file menu above) Then Web Component |
|
|
|
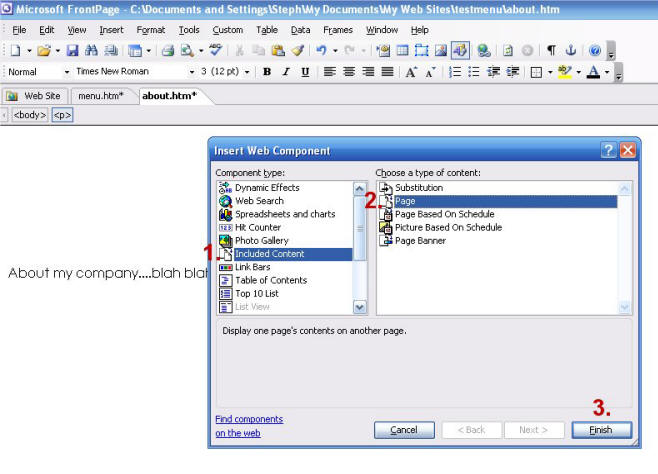
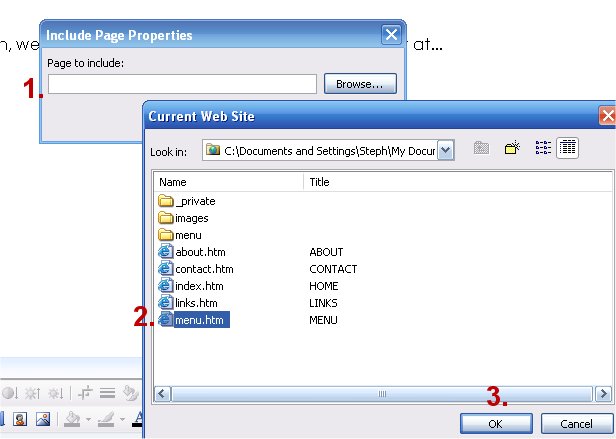
1. Locate the Included Content option and select
that 2. Then on the right, select Page 3. Click Finish |
|
|
|
1. A pop up box will appear, click Browse (or
type in menu.htm) 2. Find your page with the menu on it and click it 3. Click Finish |
|
|
|
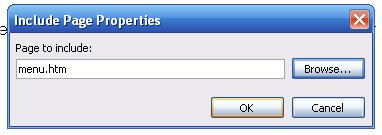
You will see the
menu.htm appear in the Include Page Properties box.
Click OK |
|
|
|
There! You're
menu will show up on any page you want by using this method.
NOW If you want the menu on the contact.htm page, you don't have to
do this all over again, JUST right click on the menu on the page
index.htm or about.htm and select copy, then right click
on the page you want it on and select Paste where you want the menu.
Paste the menu on as many pages as you like. It is pasting a
Web Component on each page. This way, if you change the menu
options on the menu.htm page, you don't have to find 10 pages and
fix them, it automatically fixes the menu on every page. When you publish the menu, be sure to upload the menu folder we made, and re publish ALL pages that contain the menu!!!! (every time you change the menu, republish ALL pages in addition to the folder called menu.htm) |